How to Integrate a WordPress Form with MailChimp

I’m a big fan of MailChimp. In a perfect world, MailChimp would build a WordPress plugin that gave you feature parity with the MailChimp app. Forms design, list management, bulk mailouts, and that funky chimp mascot. That’s not about to happen, but in the meantime there are plugins that you can use to integrate your WordPress forms with MailChimp.
The goal of this exercise is to create a form in Wordpress and link the input fields to a list in MailChimp. Here is what I’ve set up for this exercise:
- A MailChimp account
- A target list in MailChimp: the list that users subscribe to. Mine is called Volunteer Candidates for people who sign up to volunteer at an event.
- A sign up page in WordPress: the form has to live somewhere!
What you’ll need:
MailChimp for WordPress: This is the most established and popular plugin for MailChimp integration. They offer free and premium versions. For this example, the free version works just fine.
MailChimp API key: This is how the plugin links your form on WordPress to your MailChimp account. MailChimp generates this key for you, and all you have to do is copy and paste it into the plugin’s settings.
1. Connect WordPress to Your MailChimp Account
Once you’ve installed the MailChimp for WordPress plugin, you’ll see it appear on your dashboard:

Now you need to enter your API key. Begin by clicking the link ‘Get your API key here’ which puts you into MailChimp. You can watch the demonstration or follow these simple steps:
- Click on your Account settings on the top right of the MailChimp page and select ‘Account’ from the drop-down list.

- Then click on Extras and select ‘API keys’
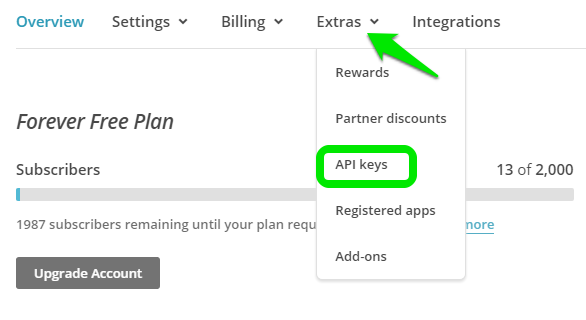
- At the bottom left of that page, click on ‘Create a Key’ and MailChimp will generate one for you. This is the key you will copy and paste into the plugin’s MailChimp API key field.

- Once you do this (and Save Changes), you’ll know whether you’re successful if MailChimp shows that you’re now Connected. You’ll also see that the plugin has found the lists for your account, and it even shows you the fields for those lists.
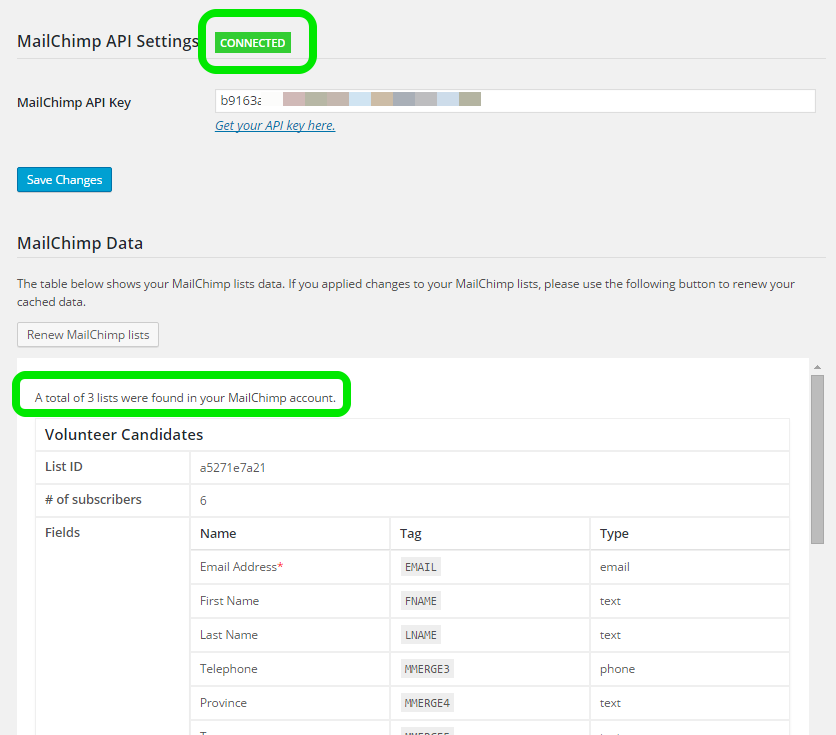
2. Connect Your Form to the List to Subscribe to
Select the Forms settings. There are three lists in my MailChimp account. The one I want my form to subscribe to is called Volunteer Candidates.

If you select more than one list, the form will push data to more than one list so you need to be consistent with field names.
3. Create Your Form
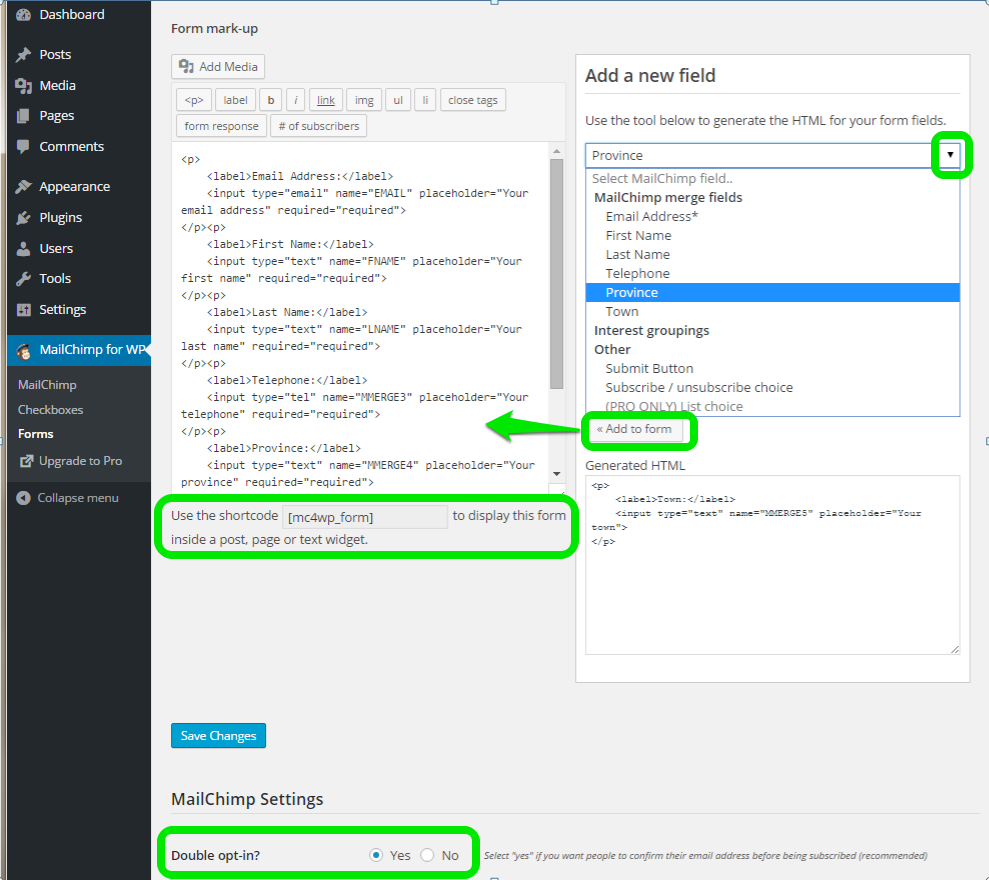
What the plugin does is generate HTML code according to the form fields you select from the drop-down list under ‘Add a new field’.
- One by one, in the order you want the fields to appear on the form, select the fields you want from the drop-down list, which shows you the MailChimp merge fields.
- Select ‘Add to form’ for each one.
- Remember to add the SUBMIT button at the end. You’ll find it in the drop-down list.
If you change your mind about the order of the fields or forgot to make a field required, and you’re comfortable with editing a bit of HTML, you can do so in the Form mark-up editor. You can also add media, or your own text using this editor.
Each time you select a field from your list, the plugin adds more code. It incorporates the code into a shortcode that you use wherever you want the form to appear on a web page, post, or widget. In this case, the shortcode generated is called '[mc4wp_form]'. Remember to Save Changes!
NOTE: If you live in Canada, remember to comply with CASL (Canadian Anti-Spam Legislation) and select the Double opt-in setting.
4. Implement the Form
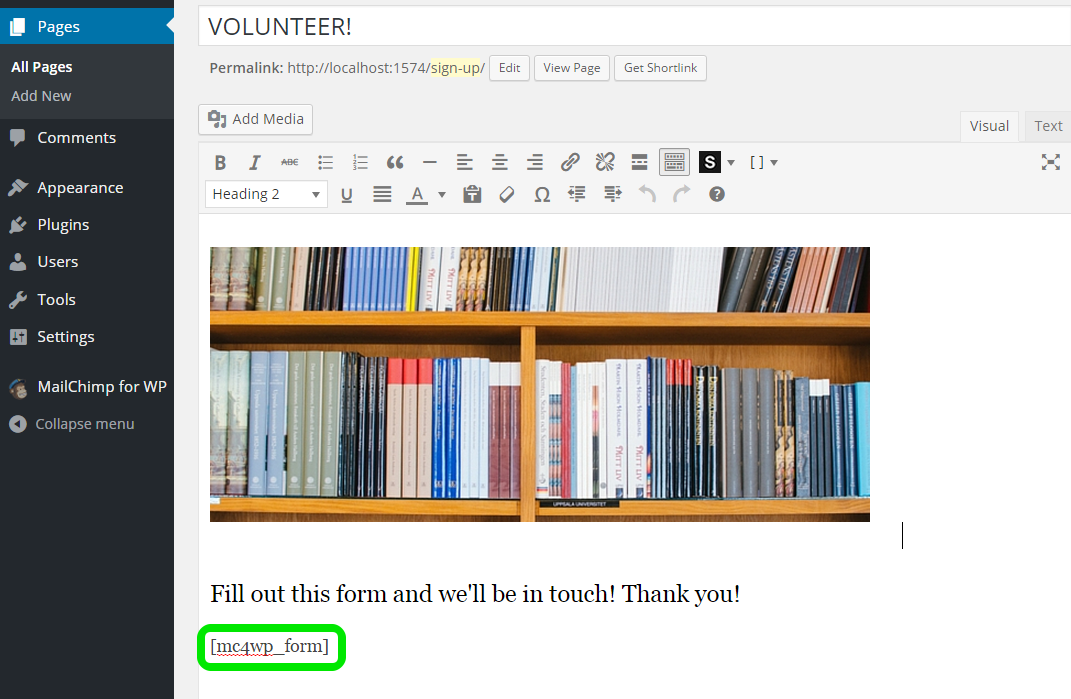
Add the [mc4wp_form] shortcode (or whatever shortcode is assigned) to where you want it on the page. That’s all. Here is what it looks like in the text editor.
Here is what the resulting form looks like to users:
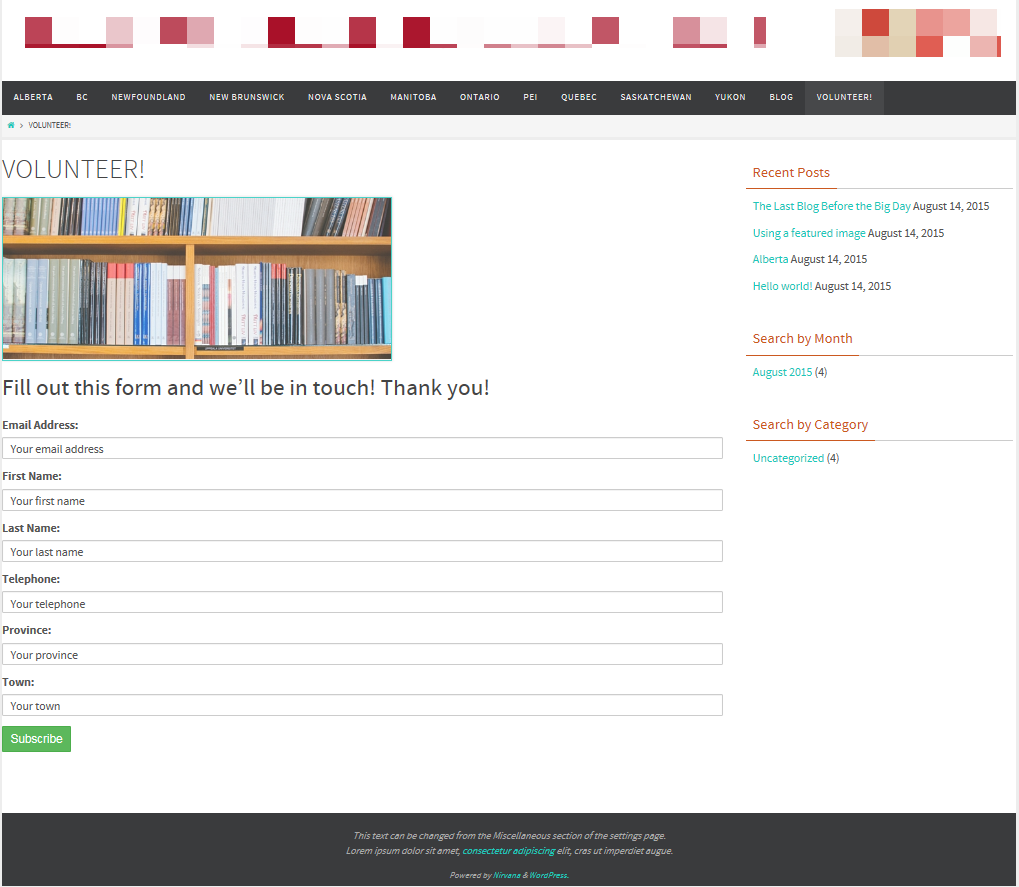
5. Test Your Form
As a user, fill out the form with test information and a test email address. Upon pressing SUBMIT, this is what I get:
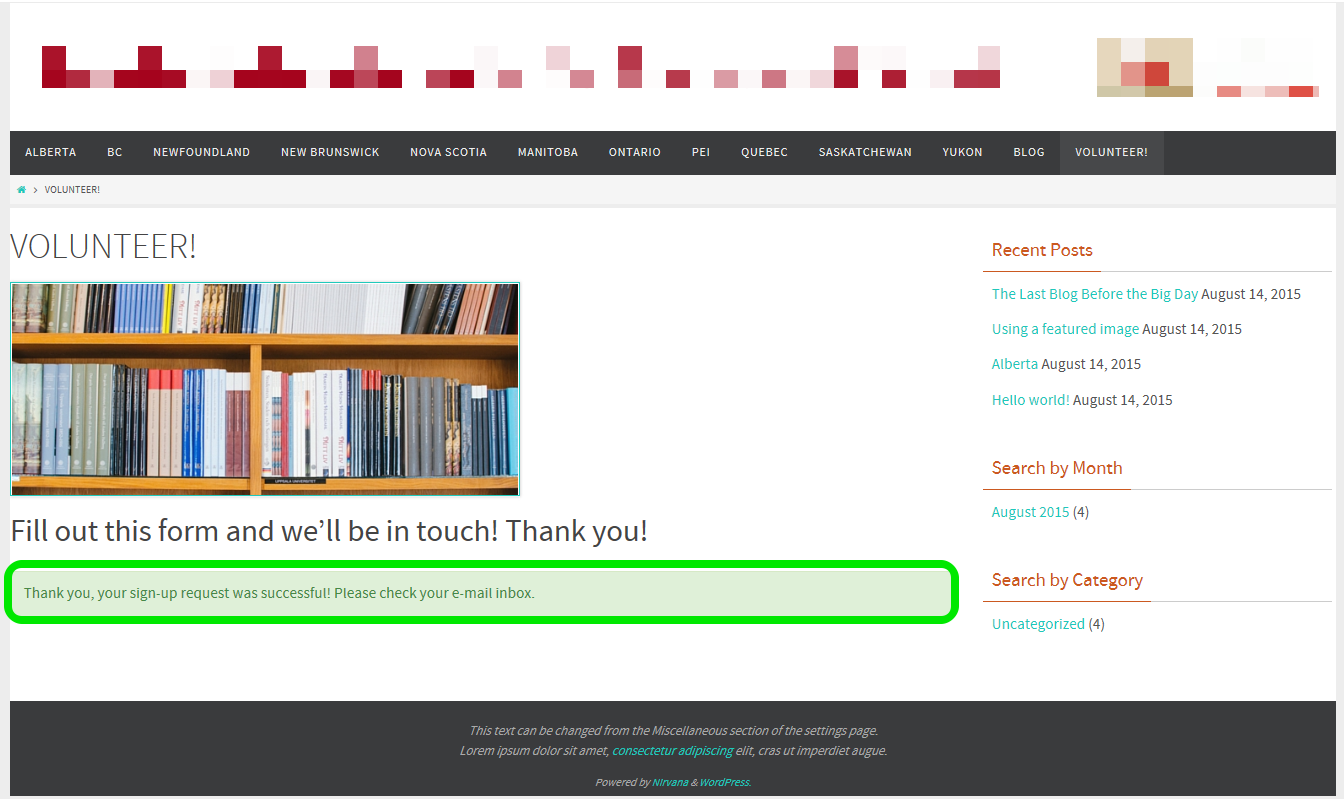
NOTE: The sign-up confirmation message is customizable. You can find these options in the plugin's Forms settings, under Form Settings & Messages.
Since the sign-up requires a double opt-in, let’s take a look at the (test) email account I used to fill in the form. I've received an email asking for confirmation to subscribe – very MailChimp looking!
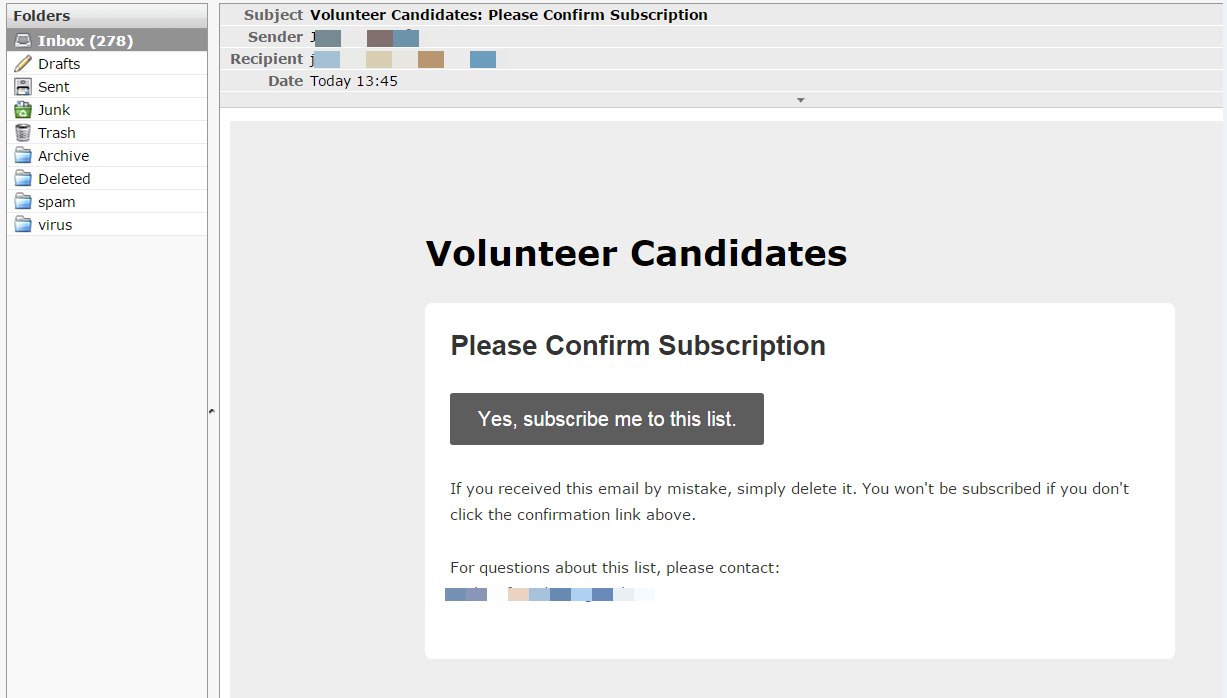
And if I were to go into MailChimp and take a look at my lists, I would see that my new test user has been added to the Volunteer Candidates list.
In Conclusion
With the MailChimp for WordPress plugin, you can create forms that integrate beautifully with your MailChimp lists. All the defaults work well, but it’s also customizable via Form Settings & Messages. You can show subscribers the standard ‘successfully subscribed’ message after they press SUBMIT (as in our example), but you can also redirect them to another page.
If you’re comfortable with HTML or have a colleague who can help, you can use the Form mark-up editor to build a more attractive form: add logos, include formatted text and links etc.
With more than 300,000 installations, this is a well-established and technically solid plugin. The free version allows only one form at a time and this may be sufficient for you. The premium versions allow unlimited forms and also offer more integration capabilities. Don’t balk at paying a reasonable price for a high-quality solution when it makes your email marketing easier to manage. Your mailing list is one of your most valuable digital assets.
Email is cost-effective, measurable, timely, and personal. At Smartt, email marketing is an essential component of our P.A.C.E. (Promote, Analyze, Convert, Engage) digital marketing framework. If you have questions about email marketing or any other aspects of digital marketing, just contact us for a free consultation or sign up for a P.A.C.E. workshop.


